The Ultimate Guide to Lesson Planning in the Elementary Music Room - Part 3

steps to yearly planning in the music room

When lesson plans are built on solid and purposeful teaching strategies, they are quick and painless to write!  They are simply the implementation of all the ideas, strategies, and sequences you’ve documented over the planning process.

Be sure to read the first and second parts of this series where we look at how to map out a long-range plan for your music room.

Now we're on to the final step of the planning process: daily lesson plans.


music education podcast

Psst - On the go? Listen to this post instead of reading!


lesson plans for the music room
 

$39.00
Add To Cart

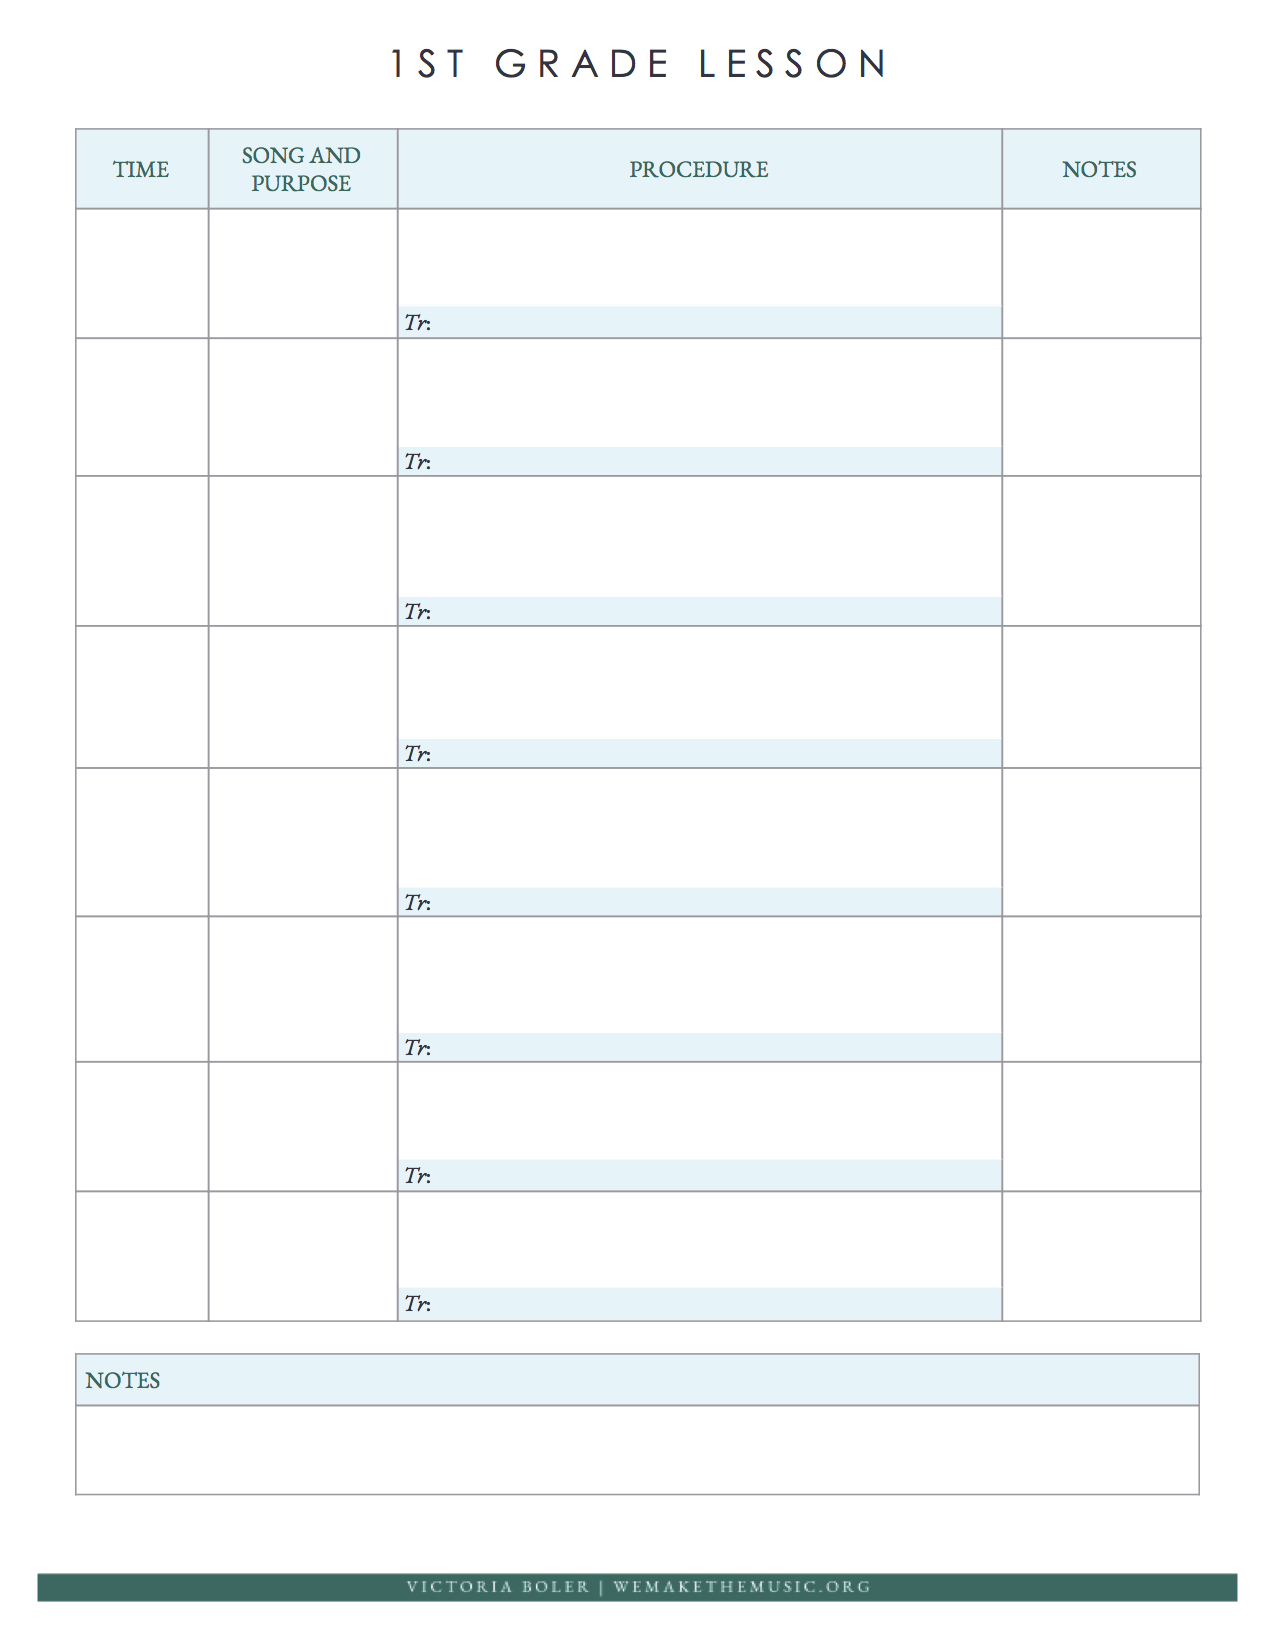
The image below is the planning template I use to create all my lessons.

It includes everything I need from standards to assessments, and since it's a google doc I can edit and access it from anywhere.

It's available to purchase here as part of a larger planning kit, or you can easily create your own from scratch! 

Parts of a Lesson Plan:

The first page of this lesson template invites you to think through exactly what your intentions are, so you get a quality, purposeful lesson plan every time! If you take a look at the first page of the lesson planning template, you'll see several important components to include. 

Let's break each of them down.

Lesson Objectives in the music room

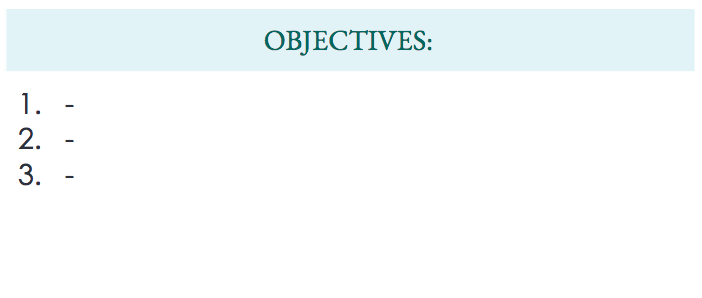
Lesson Objectives: These are easily measured, action-oriented, and student-centered goals for the lesson. Avoid phrases like “the student will learn about”, or “the student will understand”. Instead, focus on action verbs: “the student will improvise”, or “the student will sing”.

assessment in the music room

Assessments: How will you know students have completed your lesson objectives? Keep assessments informative for you, and fun for your students. Each lesson should have some (simple) way for you to measure students’ understanding and skill level. You can read more about assessment in the music room here.

materials for a music lesson plan

Materials: What materials will you need for the lesson? Puppets? Instruments? Often I need to prepare materials from scratch such as smartboard presentations or visuals. This section of the lesson plan keeps me on track so I remember what materials to set out before a class arrives, or what materials to create.

Music lesson plans

Other Notes: This is the “catch all” section. If you have one class behind the others, if you’re being observed that day, if you have a student who needs special accommodations, this is the place to document it.

Skills and Standards: What skills are your students using in your lesson? Make a note of how you are asking students to interact with musical concepts. In the planning kit template I’ve only listed the National Core Arts Anchor Standards for simplicity. They can easily be substituted for your state standards in the google doc.

standards and skills in a music lesson plan

IF YOU'RE MAKING PAGE 1 FROM SCRATCH: 

If you're making your lesson planning template from scratch instead of purchasing the planning kit, start by listing the grade, date, and lesson number at the top of the page. 

Then, list out the following components of a lesson plan: objectives, assessments, materials, notes, standards, and skills. Leave room under each category to make your notes.


Writing the Lesson:

The second page of the lesson plan is where the actual teaching process lives. It's the section you'll refer to most when you're in the classroom teaching. 

When it comes to writing the lesson outline, refer back to your scope and sequence for the lesson focus, and your concept plan for teaching strategies. This is where all the hard work pays off! Plug in the activity and flesh out the process. Tweak anything you need to from the original concept plan.


Lesson Planning Tips for Music Teachers:

1. Pacing:

It’s a good rule of thumb to keep each activity fairly short (think of the attention span of your students!), and to alternate between times of high concentration and relaxation. This structure keeps your pacing quick so students stay engaged.

2. Transitions:

Pay attention to how you plan to move from one activity to the next (transitions), as this is where the bulk of classroom management problems arise.

Transitions are used for entering and exiting the music room, changing from one song or activity to the next, setting up for a game, and moving to instruments. 

Here are a few transition categories to get you started: 

  • Verbal / Textual: These are the most common in younger grades. Students love stories, so connect activities with a narrative if you can. Example: After students play the game to Apple Tree, suggest that you take an apple to your friend, Johnny, who is hungry after all his hard work building a house. Then sing Johnny Works with One Hammer.

  • Musical (Melodic): Use identical melodic phrases to transition to a new song (such as Lucy Locket and We are Dancing in the Forest). The class sings the phrase on solfege, then the teacher asks, “What other song could this be?” Students guess from a list of songs on the board.

  • Musical (Rhythmic): Read a rhythmic phrase of a song written on the board. The teacher changes one note at a time until the rhythm becomes the beginning of the next song.

  • Nonverbal: Our students have to sort through a staggering amount of verbal information in a typical school day. A nonverbal transition can be a refreshing change for both you and your class! Use sign language for sit and stand; Use pictures of game formations such as concentric circles, longways set

  • Movement: We Orff inspired teachers are always looking to add more movement to our lessons! Have students glide, stomp, tiptoe, slither, flounce, sneak, or jump to their next location.

IF YOU'RE MAKING PAGE 2 FROM SCRATCH: 

If you're making the lesson outline from scratch, create a table four columns across and about six to eight rows down. The actual number will depend on how many songs you choose to include in your lesson. 

From there, record the time of each activity, the song you'll use, a detailed teaching process, and any special notes or considerations to keep in mind. 


There you have it! 

$39.00
Add To Cart

Daily lesson planning can be a breeze when you've done the right long-range planning beforehand.

You can grab the planning kit to help make your year planning smooth, or create your own templates from scratch by following the process in these blog posts:


Yearly Music Planning Tip: 

It’s okay to adapt as you go! You can’t anticipate everything that will happen over the course of the school year and how your plan will need to change to fit your unique teaching situation. Drop any activities that don’t serve you or your students, and let go of any pressure you feel to implement your yearly plan exactly as you wrote it.

Ultimate Guide to Lesson Planning in the Music Room: Part 2

It's planning time! 

Summer is a great time to start planning your music curriculum, but if if you're in the middle of the school year it's worth it to think carefully and creatively about your goals for your students. 

Be sure to read the first part of this series where we look at outlining your ideal curriculum, and creating song lists. 


$39.00
Add To Cart

All the templates in this post are available as part of my Elementary Music Planning Kit, but you can easily create your own from scratch!

Let's jump into planning out your year through a scope and sequence, and creating solid teaching strategies through a concept plan.


Planning in the Music Room Part 2
 

Scope and Sequence: What to teach when

As you look at your school year, it’s helpful to think through how much time you can devote to one concept. Those decisions are made and documented in a Scope and Sequence.

This template is a part of my Elementary Music Planning Kit. You can grab that here, or you can easily create your own template from scratch!

Scope and Sequence Elementary Music Planning

Creating Your Scope and Sequence:

When you create your scope and sequence you’ll have some decisions to make about which concepts to prioritize, since you likely won’t have time to cover everything!  Keep in mind the same questions you asked during the curriculum outline:

  • How often do you see your students? How long are your classes?

  • How long have you been teaching these students?

  • How in-depth with each concept do you want to go?

IF YOU'RE MAKING FROM SCRATCH:

If you're making your own template from scratch instead of purchasing the planning kit, start by listing the months you teach along the top of the page. Then, along the lefthand side write all the concepts you want to cover for that particular grade level. 

Give yourself some breathing room in the schedule to accommodate things like sick days, bad weather, assemblies on Friday afternoons, field trips, and concert prep.


Concept Plans

Concept Plans are where things get interesting. It’s where teachers get creative, playful, and artistic. It takes a significant amount of brainpower to put this together, but once it's done this is the document you will reference the most as you create daily lesson plans later.

My concept plans are available to purchase here, but you can easily make your own as well.


Writing a Concept Plan

On the first page fill in the grade, element, and dates you plan to teach. Depending on the element, it’s reasonable to spend about four weeks on preparation and about five or six weeks on practice.

Previous Knowledge:

What information will your students need to recall in order to be successful at this new element?

For example, if you are teaching quarter notes and eighth notes to First Grade, they will need to have a solid understanding of steady beat, rhythm, and the difference between rhythm and beat. If you are teaching re to second grade, students will need to have lots of experience with sol, mi, la, and do.

Take a look at where your students have been to consider when they will be ready to move forward with this new concept, and how you can help them connect the dots from the known to the unknown.

Unit Overview:

1. Knowledge

At the end of the unit, what do you want your students to understand (knowledge)? What do you want them to be able to do with that understanding (skills)?

If you are teaching quarter notes and eighth notes to first grade, you might write that students should understand that a beat can have one sound on it (ta) or it can be divided into two sounds (ta-di).

2. Skills

How do you want students to be able to use their knowledge?

Here are a few options:

  • Sing

  • Play

  • Create (improvise / compose / arrange)

  • Read

  • Write

  • Move

Pre and Post Assessments:

We have a list of what we want our students to understand and be able to do. Next we’ll need evidence to tell if we’ve achieved our goals or not.

The role of assessment is simply to discover what our students need from us. Pre-assessments and post-assessments give us valuable insight into how our students are progressing, and how we can best support them.

A pre-assessment may show you that your students will be ready to move ahead much faster than you anticipated. A post-assessment may show you that you need to slow down and consider taking a few weeks more of preparation to ensure that your students are fully ready to move to the next concept.

These pre and post-assessments are formative, and should be play-based and fun. In music, assessment often looks like regular classroom activities. The difference is how the teacher records and uses the information.

The Preparation Phase:

To prepare the new element, start by selecting about five songs or rhymes to use. The actual number will depend on the element, grade level, and how deep you want to go into the material.

When we prepare an element, we’re asking students to use it before they know its “real” name. We call the element by what it sounds like, or how it behaves. Instead of quarter notes and eighth notes, we might say “long” and “short”. Instead of la, we might say “high”.

Calling an element by what it is rather than its traditional western name allows students to interact with, explore, and discover the element’s properties on their own.

A Word on Modes of Learning:

Teaching strategies are commonly broken down into three basic categories that have come into question in recent years(read here and here): physical, aural and visual.

While these modes are certainly not the only ways students learn, and in no way encapsulate the entirety of our teaching strategies, I continue to reference them when I create my concept plans. Music is a subject that very naturally uses physical, aural, and visual activities.

Creating Preparation Activities:

Many early experiences with an unknown element will be through imitating the teacher, singing songs, and playing games.

From there, students become conscious of the new element.

In late preparation, students can relate the unknown element to other known elements (it’s higher than, lower than, longer than, shorter than, etc.)

At the end of the preparation stage, you’ll want to think through an assessment that tells you if students are ready to move on to presentation or not. This presentation test can be a single activity, or a collection of activities. A good rule of thumb is that if they can aurally identify the element, other skills will fall into place with practice.

IF YOU'RE MAKING FROM SCRATCH: 

If you're making your preparation activities from scratch instead of purchasing the planning kit, write "Preparation Activities" at the top of the page. Along the top, list the words, "Physical", "Aural", and "Visual". Along the lefthand side, list four to five songs or rhymes you will use with that particular concept.

At the bottom of the page, write an idea for your presentation test.

Creating a Presentation Sequence:

Presentation Elementary Music Planning

The next phase in the concept plan is the presentation phase. This takes place over one lesson, and is quite structured. The presentation lesson tells students the name of the new element, what it looks like, and what we call it.

For example, the name of one sound on a beat in common time is a quarter note, but when we see the quarter note symbol we say “ta”.

Choose one song or rhyme to use for the presentation. Ideally, this is a song or rhyme that only uses the new element in one place, leaving all the other elements known.

Write out your presentation, as well as any visuals you’ll need in the lesson.

IF YOU'RE MAKING FROM SCRATCH: 

If you're making your presentation plan from scratch instead of purchasing the planning kit, write "Presentation" at the top of the page. List the song you're using at the top as well. Then, write your procedure in bullet points so it's easy to read at a glance. At the bottom of the page jot down any visuals you'll need in the lesson. Easy peasy. 

Creating Practice Activities:

In the practice phase, you might have students improvise a B section on unpitched percussion instruments. You might have them read known and unknown songs. You might have them create a melodic ostinato using the new element.

Now is the time to circle back to the list of knowledge and skills you wanted your students to walk away with at the end of the unit.

The “Extra Practice” section is the place to add extensions like books or listening activities. It’s also a great place to add new songs to students’ repertoire so they get to use their knowledge and skills in a new setting. Fill in these activities like you did the practice section before.

IF YOU'RE MAKING FROM SCRATCH: 

If you're making your practice activities from scratch instead of purchasing the planning kit, use the same page format that you used for preparation activities. Replace the teaching ideas but keep the same songs and rhymes. For "Extra Practice", keep the same page format again, but replace both the songs and the teaching activities. 


Music Planning Tip: 

Start small.
Planning can be an overwhelming process when you sit down to tackle your K - 5 school. Instead, start with one grade level, one concept, one lesson. You may not have an entire summer, fall break, or weekend to devote to planning. Look for short amounts of time to tackle bits of the planning process. Any amount of planning is well worth it!


Up next in this planning series, we'll look at creating purposeful and active lesson plans. 

Let's go! 

Yearly Planning in the Music Room

Up Next